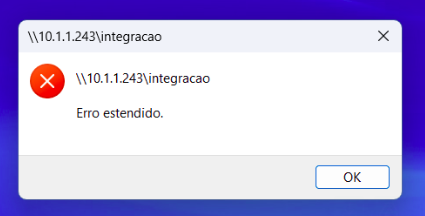
As últimas atualizações do Windows estão bloqueando alguns recursos de rede, dentre eles o acesso a rede como convidado.
Ao acessar um compartilhamento de rede o sistema retorna a seguinte mensagem de erro:
Você não pode acessar a pasta compartilhada porque as políticas de segurança da sua organização bloqueiam o acesso de convidado não autenticado. Essas políticas ajudam a proteger seu computador contra dispositivos não seguros ou mal-intencionados na rede.
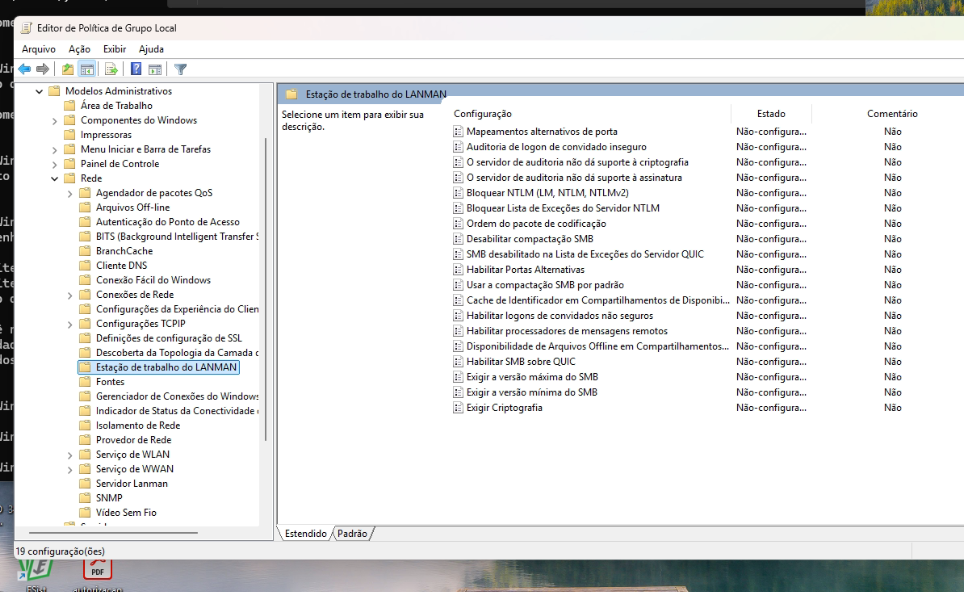
Para isso será necessário habilitar o logons de convidados não seguros no GPEDIT
Abra a ferramente GPEDIT Gerenciamento de Política de Grupo digitando gpedit no Executar do Windows
Navegue até: Configuração do Computador > Modelos Administrativos > Rede > Estação de trabalho LANMAN > Habilitar logons de convidados não seguros.
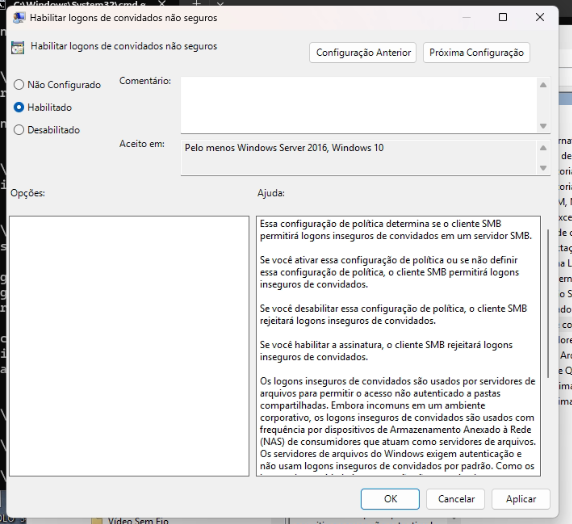
Habilite o “Habilitar o logons de convidados não seguros”