DST Root CA X3 Certificate Expiration Problems and Fix

Today, the DST Root CA X3 certificate expired, leaving many devices on the internet having issues connecting to services and certificates that use this Root CA, including those using Let’s Encrypt certificates.

Some of these problematic devices include Samsung Galaxy phones, iPhones, VDI zero and thin clients, and even Sophos UTM firewalls.

In my environment, I noticed a number of issues when browsing to websites that use the free Let’s Encrypt certificates, as the Web Protection Web Filtering service on my Sophos UTM firewall would report the certificate has expired and not allow me access to the websites using it.

The Problem

Let’s Encrypt originally used the “DST Root CA X3” certificate to issue Let’s Encrypt certificates. However, as time has passed and the service has been used more, they now use “ISRG Root X1” and “ISRG Root X2” as Root CA’s and “Let’s Encrypt R3” as an intermediate certificate.

Older devices may be using the older Root CA which expired today (September 30th, 2021). Please see https://letsencrypt.org/docs/dst-root-ca-x3-expiration-september-2021/ for more information.

The Fix

To fix this issue, you need to add the 2 new Root CAs to your computer or device.

Root CA Certificates (PEM format):

Intermediate Certificate (PEM format):

You can download them by clicking the links above or go to https://letsencrypt.org/certificates/ for more information and to download if you don’t trust the above links.

After downloading and adding these Root CAs and the Intermediate CA to your computer or device, you should have the full certificate chain to validate the Let’s Encrypt certificates. The Let’s Encrypt certificates that are used on websites that you visit and that you might have deployed on your servers should now work without any issues.

If you’re still having issues, you can try deleting the “DST Root CA X3” certificate from your existing Root CAs. Also, you may need to close and reopen any software and/or browsers for it to work with the new certificate.

HTTPS Scanning/Filtering Firewall Fix (Sophos UTM as example)

If you have a firewall that scans HTTPs traffic, you’ll need to add the above certificates to the HTTPS Certification authority list.

As an example, to fix this on the Sophos UTM firewall, follow the instructions below:

  1. Download the 3 certificates above.
  2. Log on to your Sophos UTM
  3. Navigate to “Web Protection”, “Filtering Options”, and “HTTPS CAs” tab.
  4. Disable the old “Digital Signature Trust Co. DST Root CA X3” Certificate in the list.

  5. Using the “Upload local CA”, browse to and select 1 of the 3 certificates, then click upload.
  6. Repeat step 5 for each of the 3 certificates listed above.
  7. The issue has been fixed! You should now see all 3 certificates in the “Local verification CAs” list.
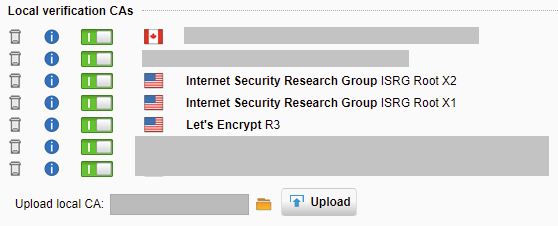
The steps should be similar for other firewalls that provide HTTPS Scanning and Filtering.
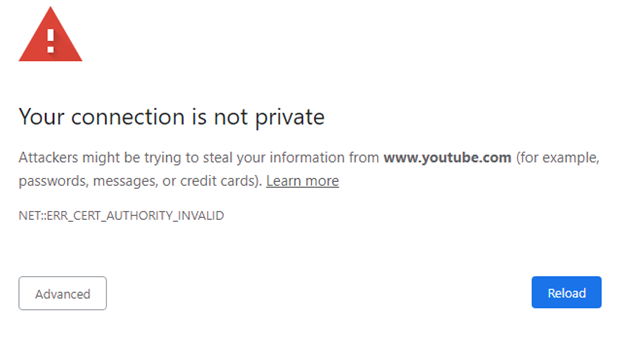
Invalid certificate when trying to access YouTube and Google on all browsers

The issue happened out of the bat mid December and I didn’t know what to do. I managed to resolve it and this thread is to share my experience because this took me several hours of research.

Your connection is not private

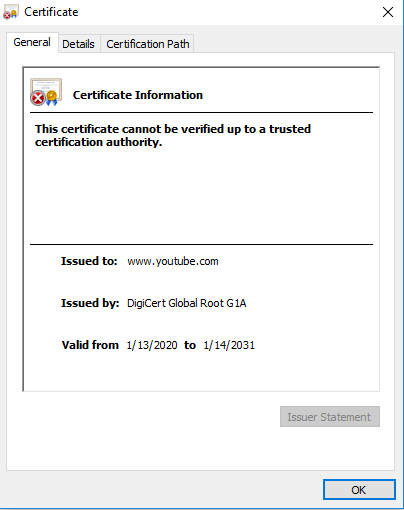
The certificate is invalid for both websites. Issued by DigiCert Global Root G1A.

Issue existed before reinstalling the Windows and reappeared after I switched the motherboard, processor and RAM of the machine as well ass reinstalled the Windows, which makes it a new machine. The websites were working fine right after I reinstalled Windows, but the issue reappeared after a few days after a restart of the machine.

Resolution:

Before the start I ensured Time and Date were correct and triple checked them as this could cause issue.

After some digging on the DigiCert Global Root G1A issued certificates I found this link – https://support.mozilla.org/en-US/questions/1286644 – where Chrome was not loading Google or captchas (I had the issue with the captchas and YouTube originally) and although the issue was slightly different – “SSL_ERROR_BAD_CERT_DOMAIN”, the person was given settings how to disable Proxy usage for Firefox. I installed Firefox (previously tried with Opera, Edge, IE, Chrome) and disabled the usage of a proxy from Windows 10 and to my surprise the websites started opening without issues.

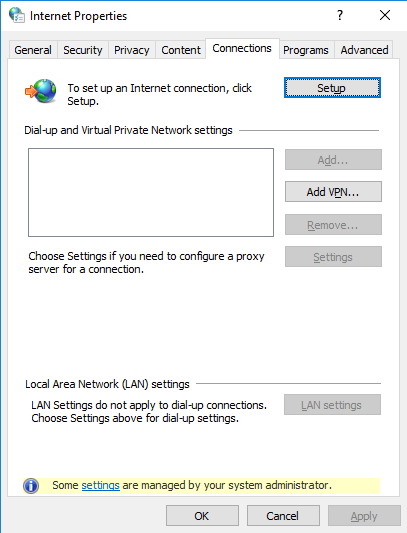
This discovery led me to the idea that Windows 10 is using a proxy by default (because I did not set up such) and started looking for ways to disable it. I was not able to change the settings via Internet Options – LAN settings as they were grayed out.

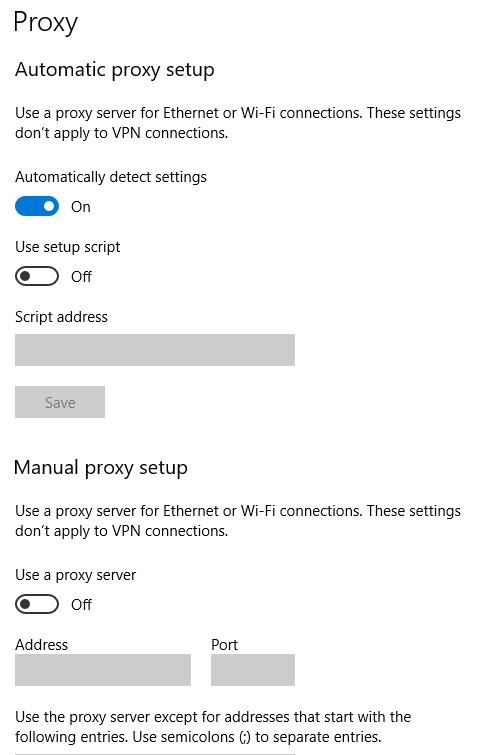
Windows 10 was opening other proxy settings though, however I was not able to disable automatic proxy from there as there was no “Save” option – it was grayed out.

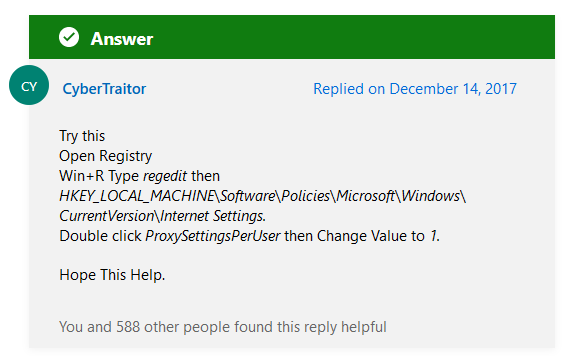
I started thinking I was stupid as the system cannot be using proxy or I am not doing something right, and proceeded searching for other methods of disabling the proxy in Windows 10, when I found this thread – https://answers.microsoft.com/en-us/windows/forum/windows_10-other_settings-winpc/how-to-disable-proxy-on-windows-10/02cf6980-2b5c-4ac9-aa25-4a61f26375e9.

This is the solution that was proposed inside:

I opened the registry path Computer\HKEY_LOCAL_MACHINE\SOFTWARE\Policies\Microsoft\Windows\CurrentVersion\Internet Settings and changed the ProxySettingsPerUser to 1.

IT WORKED!

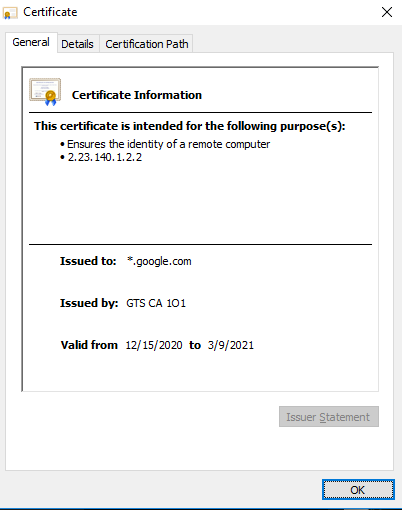
This time the certificates were coming from GTS CA 1O1 for YouTube. This was one of the strangest issues I have ever researched.

Final words:

Not sure if this happened because of the issues in December. I heard some certificate originators were blocked. Do you have any ideas what could have caused this issue on a brand new machine and Win10? I am opened to questions.

Tor must have been working because it is using a proxy of its own.

Resolving crash issues after updating KB5005565

The KB5005565 update has caused major problems on Windows systems, especially on Windows 10 and Server 2016. Among the problems we can highlight problems in shared printers or crashes/freezes after sending a document to print on a printer on the network.

A temporary quick fix until Microsoft fixes it is to add a key to the registry that fixes the problem.

Run the command below according to the Windows version in CMD as an administrator:

Windows Sever 2022: reg add HKEY_LOCAL_MACHINE\SYSTEM\CurrentControlSet\Policies\Microsoft\FeatureManagement\Overrides /v 2801335948 /t REG_DWORD /d 0 /f Windows 10, version 2004, Windows 10, version 20H2 and Windows 10, version 21H1: reg add HKEY_LOCAL_MACHINE\SYSTEM\CurrentControlSet\Policies\Microsoft\FeatureManagement\Overrides /v 2767781516 /t REG_DWORD /d 0 /f Windows 10, version 1909: reg add HKEY_LOCAL_MACHINE\SYSTEM\CurrentControlSet\Policies\Microsoft\FeatureManagement\Overrides /v 928713355 /t REG_DWORD /d 0 /f Windows 10, version 1809, Windows Server 2019: reg add HKEY_LOCAL_MACHINE\SYSTEM\CurrentControlSet\Policies\Microsoft\FeatureManagement\Overrides /v 2371422858 /t REG_DWORD /d 0 /f

Resolvendo problemas de travamentos depois da atualização KB5005565

A atualização KB5005565 tem causado grandes problemas em sistemas Windows, principalmente nos Windows 10 e Server 2016. Dentre os problemas podemos destacar problemas em impressoras compartilhadas ou travamentos/congelamentos após mandar imprimir algum documento em uma impressora na rede.

Uma solução rápida temporária até a correção da Microsoft é adicionar uma chave ao registro que corrige o problema.

Execute o comando abaixo de acordo com a versão do Windows no CMD como administrador:

Windows Sever 2022:
reg add HKEY_LOCAL_MACHINE\SYSTEM\CurrentControlSet\Policies\Microsoft\FeatureManagement\Overrides /v 2801335948 /t REG_DWORD /d 0 /f

Windows 10, version 2004, Windows 10, version 20H2 and Windows 10, version 21H1:
reg add HKEY_LOCAL_MACHINE\SYSTEM\CurrentControlSet\Policies\Microsoft\FeatureManagement\Overrides /v 2767781516 /t REG_DWORD /d 0 /f

Windows 10, version 1909:
reg add HKEY_LOCAL_MACHINE\SYSTEM\CurrentControlSet\Policies\Microsoft\FeatureManagement\Overrides /v 928713355 /t REG_DWORD /d 0 /f

Windows 10, version 1809, Windows Server 2019:
reg add HKEY_LOCAL_MACHINE\SYSTEM\CurrentControlSet\Policies\Microsoft\FeatureManagement\Overrides /v 2371422858 /t REG_DWORD /d 0 /f

Possível solução para quando você tentar abrir uma página da internet e aparecer o erro: NET:ERR_CERT_COMMON_NAME_INVALID

Permitir certificados emitidos pelas âncoras de confiança locais sem a extensão subjectAlternativeName

Alguns computadores com Windows tem apresentado problema com certificados digitais ou exibição de Captcha sempre retornando o erro ERR_CERT_COMMON_NAME_INVALID

Um possível solução para o problema é desativar a verificação do Google Chrome direto na chave de registro do Windows, trocando de 1 para 0 o valor

Registry HiveHKEY_LOCAL_MACHINE or HKEY_CURRENT_USER
Registry PathSoftware\Policies\Google\Chrome
Value NameEnableCommonNameFallbackForLocalAnchors
Value TypeREG_DWORD
Enabled Value1
Disabled Value0

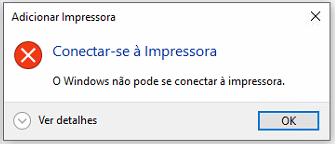
Solution for Error 0x0000011b – Windows cannot connect to printer

The issue occurs after updating from Windows KB5005565 on both Windows 8 and Windows 10.
The error prevents printers from being added to the network or any network communication with the printer from taking place.

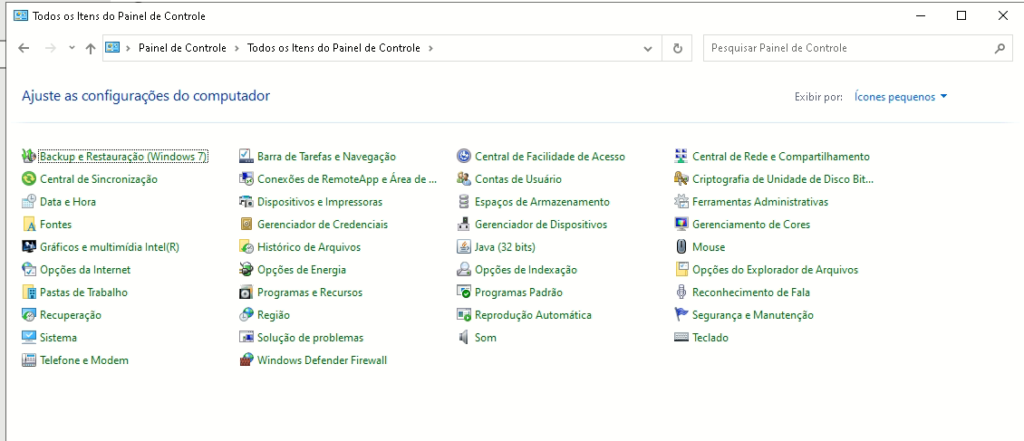
To solve the problem, remove the update, uninstalling it through the Windows Control Panel

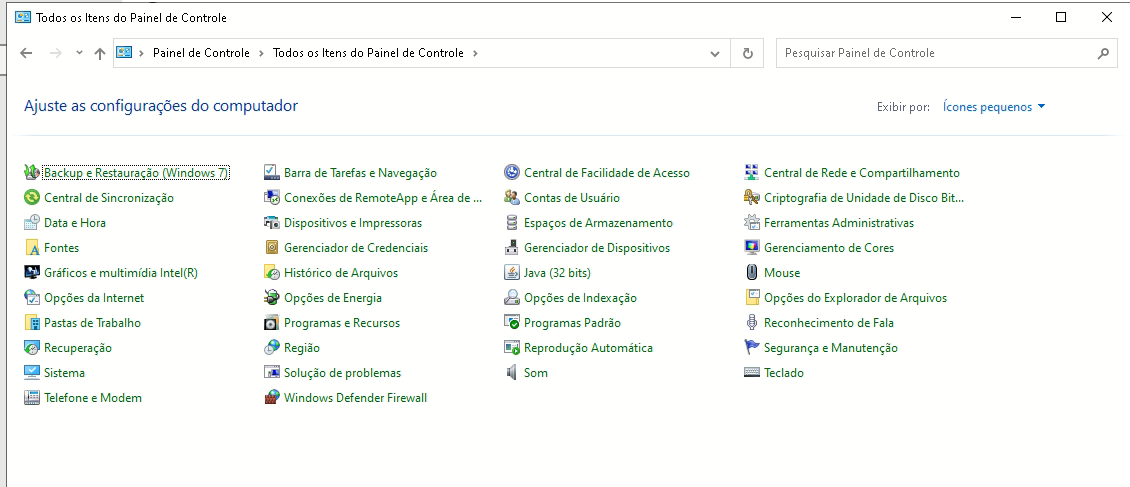
Access the Control Panel

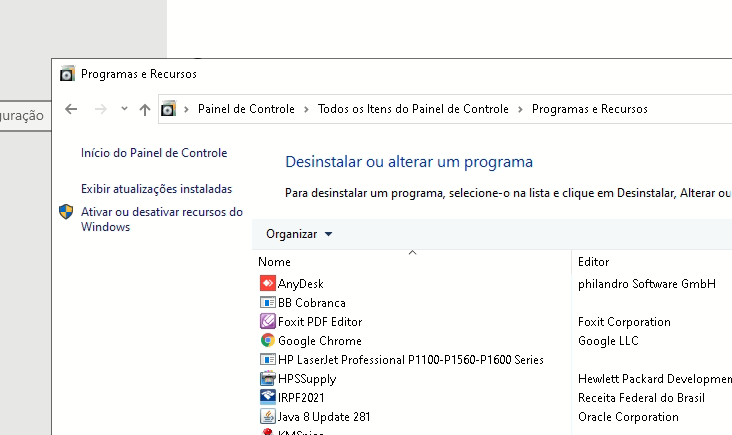
Programs and Features / View installed updates

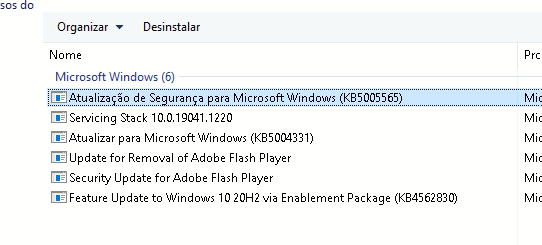
Find update KB5005565 and click Uninstall

After the process it will be necessary to restart the computer

Solução para o Erro 0x0000011b – O Windows não pode se conectar à impressora

O problema ocorre após a atualização do Windows KB5005565, tanto no Windows 8 como no Windows 10.
O erro impede que impressoras sejam adicionadas a rede ou que qualquer comunicação via rede com a impressora seja realizada.

Para resolver o problema deve-se remover a atualização, desinstalando a mesma através do Painel de Controle do Windows

Acessa o Painel de Controle

Programas e Recursos / Exibir atualizações instaladas

Localiza a atualização KB5005565 e clicar em Desinstalar

Após o processo será necessário reiniciar o computador

Migrar URL do WordPress

UPDATE wp_options SET option_value = replace(option_value, 'http://olddomain.com', 'http://newdomain.com') WHERE option_name = 'home' OR option_name = 'siteurl';

UPDATE wp_posts SET guid = replace(guid, 'http://olddomain.com','http://newdomain.com');

UPDATE wp_posts SET post_content = replace(post_content, 'http://olddomain.com', 'http://newdomain.com');

UPDATE wp_postmeta SET meta_value = replace(meta_value, 'http://olddomain.com', 'http://newdomain.com');

INSTALANDO OCI8 E ORACLE INSTANT CLIENT NO UBUNTU

1. Instalando os pacotes necessários, se você usa o Xampp esse passo não é necessário

No entanto o pacote libaio1 é obrigatório

sudo apt-get install php5-dev build-essential php-pear libaio1

2. Baixando os instaladores do Instantclient do Oracle

Próximo passo é fazer o download dos pacotes rpm necessários para a instalação do cliente Oracle. Você irá precisar dos seguintes arquivos:

Basic – oracle-instantclient11.2-basic-11.2.0.1.0-1.i386.rpm ~ 44MB
Devel – oracle-instantclient11.2-devel-11.2.0.2.0.i386.rpm ~ 590KB

Atenção para a versão do seu sistema. Caso seu sistema for 64 bits deverá baixar a versão apropriada.

Todas as versões do cliente podem ser encontradas no link abaixo.

Download Oracle Instant Client:
https://www.oracle.com/technetwork/database/features/instant-client/index-097480.html

3. Convertendo os pacotes para .DEB aceitos no Ubuntu

O que temos que fazer é converter os pacotes tipo rpm para tipo deb utilizando o Alien.

Instalando o Alien

1
sudo apt-get install alien

Com o Alien instalado basta converter os pacotes:

12sudo alien oracle-instantclient11.2-basic-11.2.0.1.0-1.i386.rpmsudo alien oracle-instantclient11.2-devel-11.2.0.2.0.i386.rpm

Neste ponto o Alien converteu seus arquivos para pacotes tipo deb, olhando na mesma pasta você deverá encontrar os arquivos convertidos.

4. Instalando o Cliente

Agora basta instalarmos o cliente utilizando os pacotes tipo deb.

12sudo dpkg -i oracle-instantclient11.2-basic-11.2.0.1.0-1.i386.deb
sudo dpkg -i oracle-instantclient11.2-devel-11.2.0.2.0.i386.deb

5. Instalando OCI8/PHP

Seu cliente Oracle ja está instalado, próximo passo é a instalação da extensão PHP OCI8.

No caso do Xampp pode ser necessário acessar a pasta de instalação do PHP em /opt/lampp/bin
e executar sudo ./pecl install oci8

1sudo pecl install oci8

Atualmente a biblioteca oci8 está destinada ao PHP 8, se você usa uma versão inferir, deve ser verificado a versão correta em:
https://pecl.php.net/package/oci8

Atenção: Durante a instalação será solicitado para entrar com o caminho  do cliente Oracle. Basta deixar em branco e o sistema irá encontrar a o caminho do instant client automaticamente.

6. Configurando

OCI8 instalado agora é só informar ao PHP para utilizar a extensão.

Adicione a linha extension=oci8.so na seção de extensões do php.ini

Dependendo do tipo de instalação do PHP o php.ini pode tá em locais diferentes da instalação padrão.

Se tudo ocorreu bem o Apache vai reiniciar sem problemas. Você pode conferir a instalação rodando um phpinfo() no servidor.

Execute #sudo php -v para verificar se tudo ocorreu bem ou #sudo php -ini para verificar a configuração do arquivo php.ini

Um exemplo simples de script para testar a conexão.

01020304050607080910111213<?php$dbstr ="(DESCRIPTION = (ADDRESS = (PROTOCOL = TCP)(HOST = 192.168.1.1)(PORT = 1521))(CONNECT_DATA =(SERVER = DEDICATED)(SERVICE_NAME = ORCL)))"; if($conn0 = oci_connect('usuario','senha', $dbstr)):print "CONECTADO EM 192.168.1.1";else:print "ERRO NA CONEXAO";endif;?>

Servidor pronto para trabalhar com PHP e Oracle.
Para saber mais sobre OCI8 com PHP consulte a documentação oficial em https://br3.php.net/manual/pt_BR/book.oci8.php

How do I install Composer PHP packages without Composer?

An alternative solution that worked for me (since php-download was down) can be done by making your own little local composer downloader.

  1. Download and install XAMPP locally: https://www.apachefriends.org/index.html
  2. Download and install composer locally: https://getcomposer.org/download/
  3. Open commandprompt, navigate to say c:\temp and and simply type the composer dependancy, for example: composer require league/oauth2-client
  4. Copy the files from your c:\temp folder to your web host using an FTP program
  5. Add this to the top of your php: require("vendor/autoload.php");